Real-time data processing experts
Use Calabash GUI, click on the “Pipeline” heading on top of the window. The Pipeline page becomes the current page. Set the data system to “lake_finance” and click on the big green “Create Pipeline” button.
Start to fill in the form with the following information:
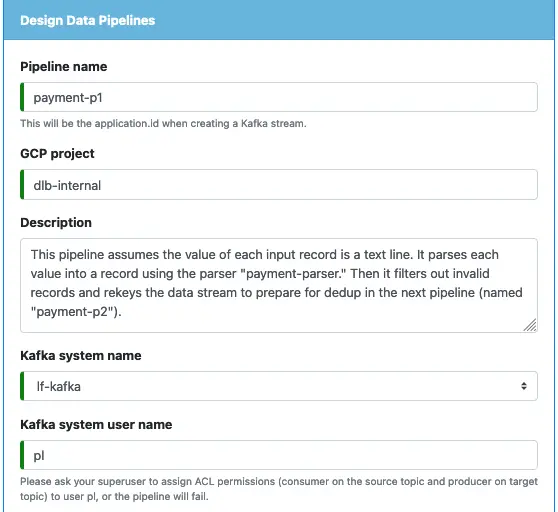
Select the Kafka system “lf-kafka” and create a user name for the pipeline. The user name can be any string without space and special characters. We must define this user name because the superuser needs it to control pipeline permissions. For example, the right to read from a topic.
Next, we define the source.
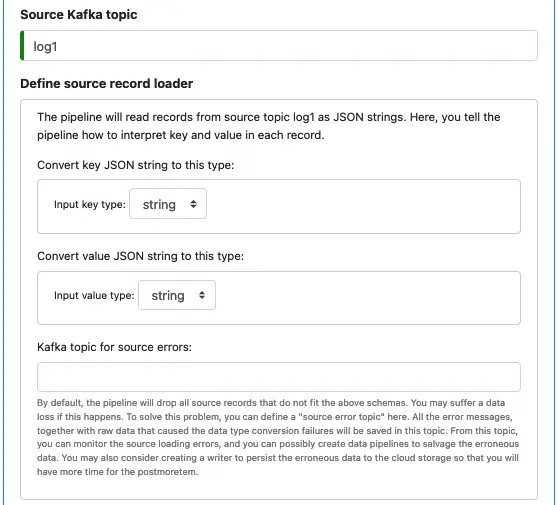
The pipeline uses a source loader to read records (of key-value pairs) out of the Kafka topic “log1.” Both keys and values are strings. In this first pipeline, we just keep the raw string format intact. Therefore, we set both input key and value types as strings. In the following tutorial track, we will see how to deserialize the input strings and catch errors in another pipeline.
Because we do not process the source strings in this pipeline, there will be no possibility of hitting errors. So we leave the “Kafka topic for source errors” empty.
Next, we will deal with a relatively complicated subject, i.e., creating processors. A pipeline is composed of a series of processors. The first one loads from the topic. And after that, each processor sends output to another processor as input. All processors line up linearly, with no loop and no branches.

To create the first processor, click on the small plus sign next to “Define pipeline processors.” The processor editor will show.
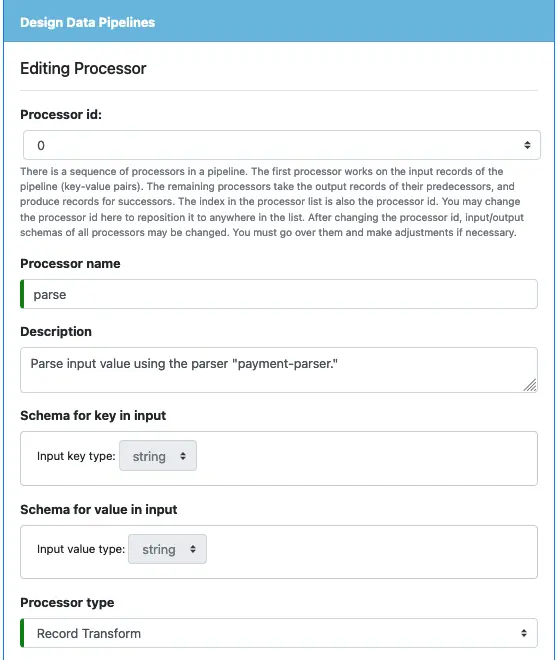
Before doing anything, please take some time to read the note about processor id. Then enter the processor name (“parse” for the tutorial) and add some description.
After that, examine the key and value schema definitions for the input. They are automatically set by Calabash GUI. We cannot change them because they are the schemas of the input topic.
For the processor type, select “Record Transform.” The processor will convert one input record to one output record.
Next, we define the output schemas.
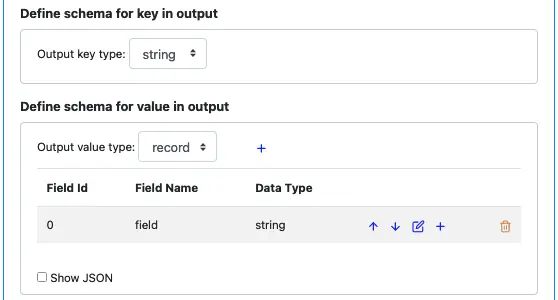
Leave the output key schema as “string.” But change the output for the value from “string” (the default) to “record.” The record contains one field (named “field”) automatically added by Calabash GUI.
We want to change the name of the first field to “ts.” Click the edit button, the field editor will show.
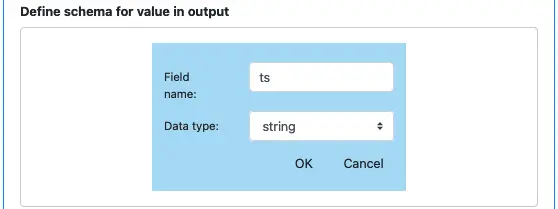
Change the name to “ts” and click on “OK” button to go back to the processor editor.
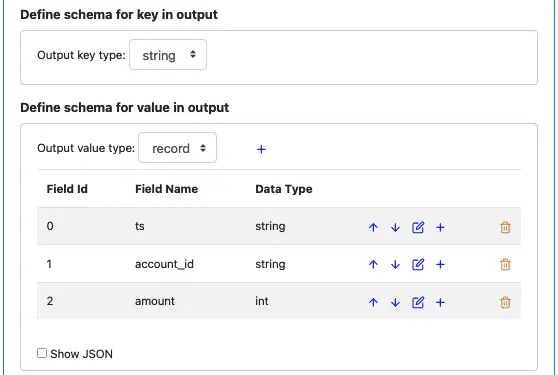
Use the small blue plus button to add two more fields (“account_id” and “amount”) below “ts.” The value schema should look like the above screenshot.
Next, we need to define the preprocessing function. Preprocessing is an operation performed on the input before calculating each output field. The preprocessing prepares intermediate values to make calculating output fields easier. Otherwise, you could end up repeating the same code for multiple output fields. Parsing the input strings fits nicely in the preprocessing part.
Right now, the preprocessing function is empty.

Click on the edit button to start the function editor.
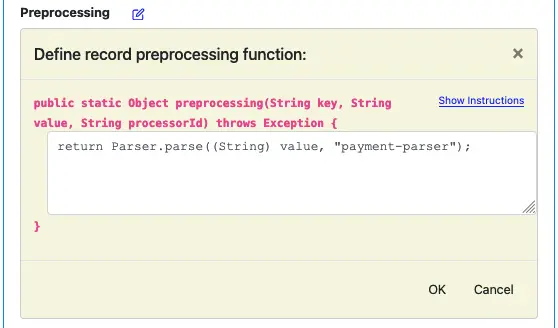
Enter the text shown in this screenshot.
The preprocessing function is really a function. The function editor displays its signature for your convenience. To understand the function signature, click on the “Show Instructions” button to display instructions.
In this example, we call the parser “payment-parser.” The format of calling a parser is
Parser.parse(STRING-TO-PARSE, "PARSER-NAME")
All the code snippets in Calabash are in Java. The parse function takes the input string and returns an object of class Map<String, Object>. This map contains the parsing result with record field names as keys.
So in the above, the preprocessing function returns the parsing result as the preprocessing result.
Click on the “OK” button to go back to processor editor.

When you are back to the processor editor, the “Preprocessing” property shows the body of the preprocessing function you have just entered.
Next, we calculate output fields.
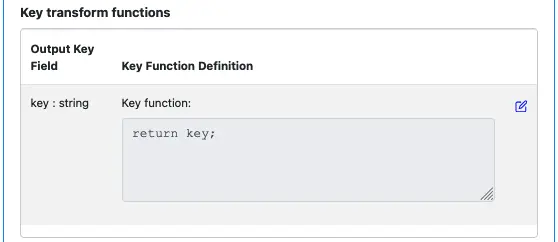
First, we calculate the key of the output. In this tutorial, we do not want to change the key. So the function for calculating the output key just returns the input key. See below.
Next, we do calculations of output fields for the value.
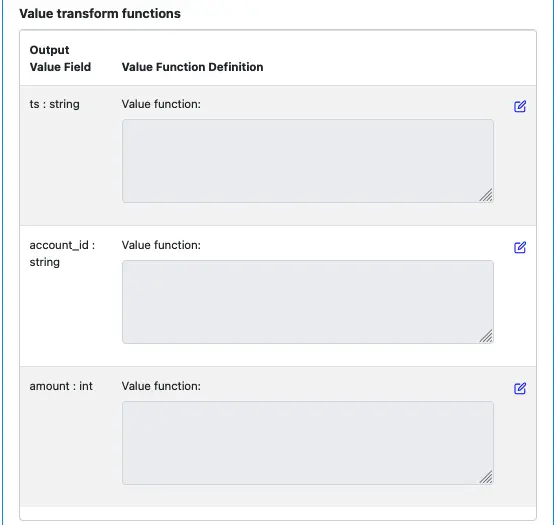
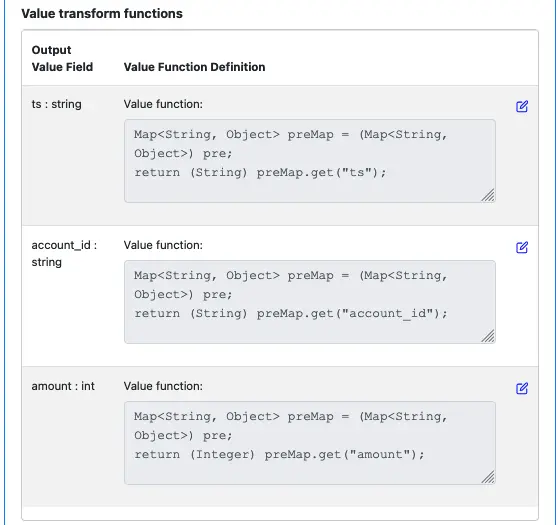
Use the edit buttons, add transform function implementations for all the output fields. Make sure the value transform functions look like the following screenshot.
Finally, provide a Kafka topic name for holding errors from this processor. This topic is called “error topic.”
If there is an exception in this processor, Calabash will write an error log to this topic. The error log record contains the raw input value and an error message. No data is actually lost. You can optionally skip the error topic, which means silently losing the input record if it hits an exception in this processor.

Click on the “OK” button to go back to the pipeline editor. The Calabash GUI looks like the following.

With structured records, we can access data more logically. For example, we can evaluate Boolean expressions to filter out dirty data.
Next, we will add another pipeline to enforce the record validity:
Click on the small blue plus button shown in the above screenshot to add a new processor.
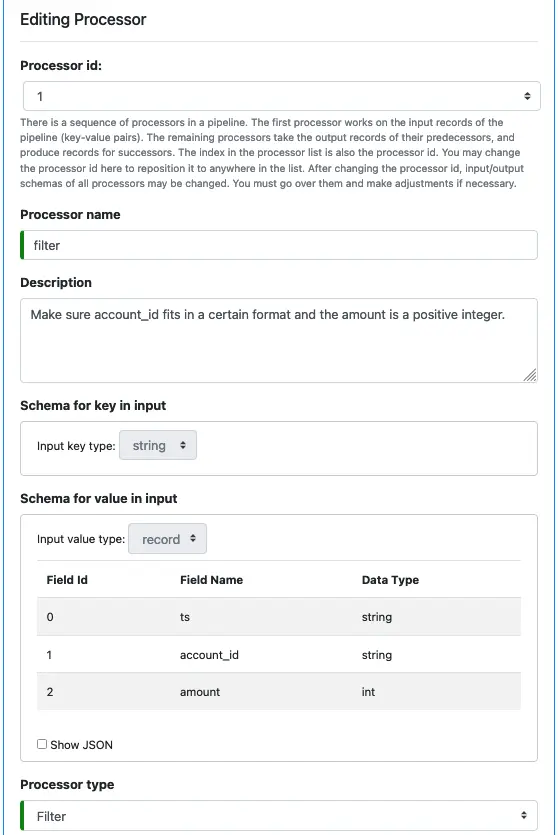
The input schemas are the output schemas of the first processor. You cannot change them. Select “Filter” as the processor type. The filter condition property appears. See blow.

Click on the edit button to add filter condition.
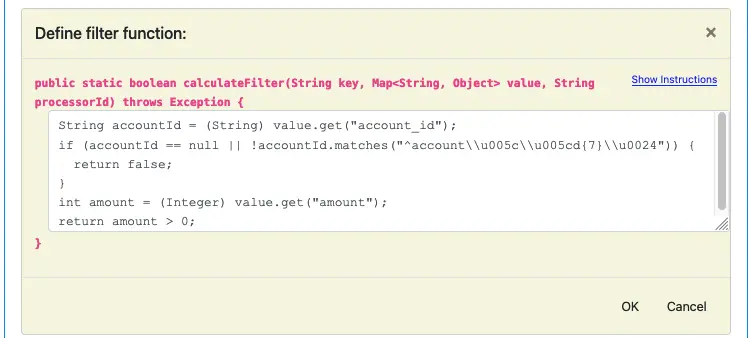
At runtime, the pipeline will call a boolean function. So you define the filter condition by implementing the body of this boolean function. Fill in the code as shown in the above screenshot.
The function checks the pattern in account_id and ensures the amount is a positive integer. Click “OK” to return to the processor editor.
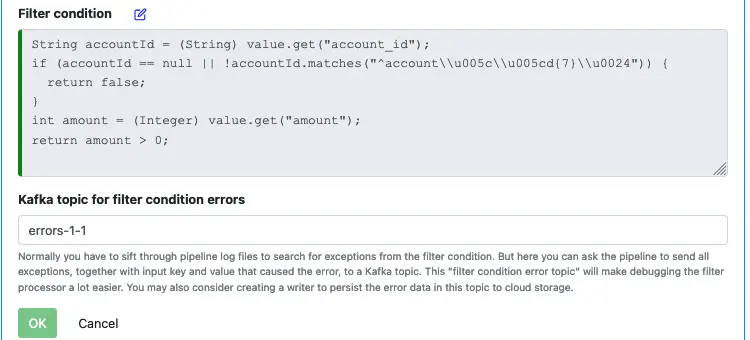
The body of the boolean function now appears in the filter condition property. Optionally, you can enter an error topic to catch exceptions.
Note that records that evaluate to false are not erroneous. They are rightfully dropped.
Click on “OK” to go back to the pipeline editor. You can see the pipeline summary looks like the following.
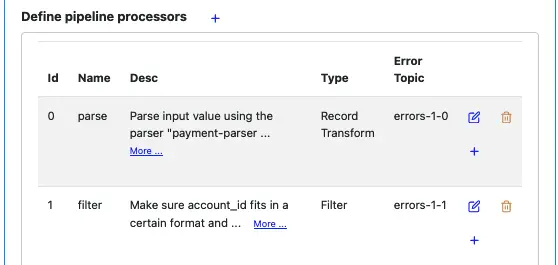
Next, we want to make “account_id” part of the record key.
At this point, the key is assigned by the reader. It is a physical key, not logical. It tells you the physical location of the record in a source file. But that is not logically important. So we want to make it logical by adding the account_id.
Click on the small plus sign on the “filer” processor line. The processor editor displays.
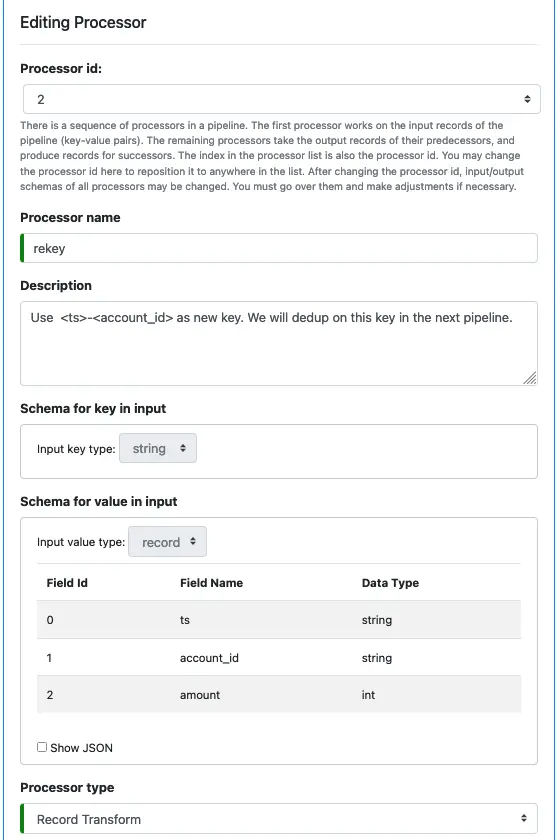
As before, you cannot change the input schemas. Select “Record Transform” as the processor type.
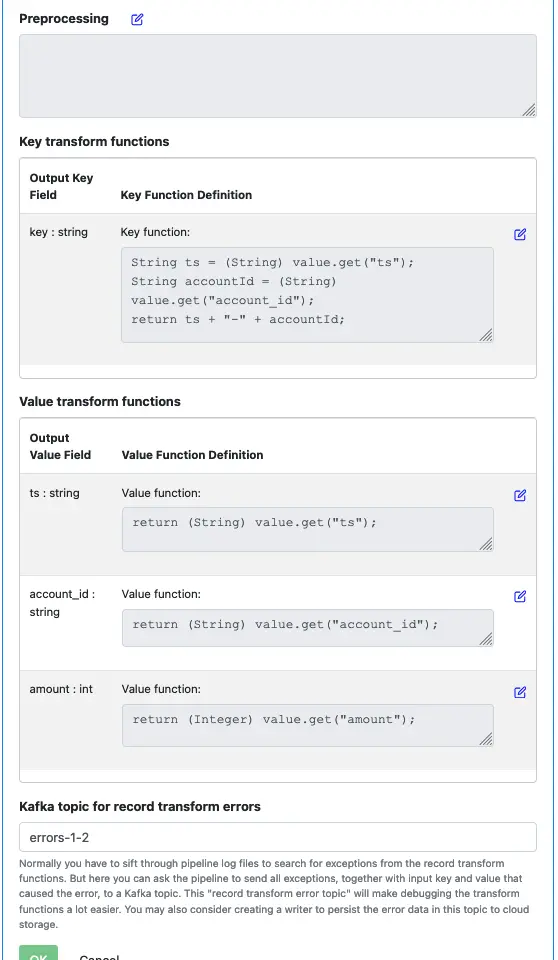
Enter text as above.
We construct the output key by concatenating “ts” and “account_id.” The output value is a mirror copy of the input value.
Click on “OK” to return to pipeline editor. The pipeline summary looks like the following.
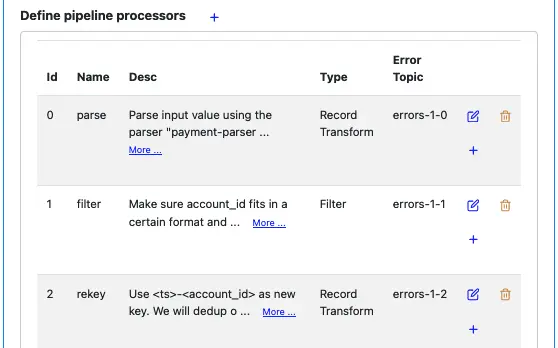
Our final processor will be a sink processor which saves data to a topic. Kafka repartitions data according to the new key during sinking.
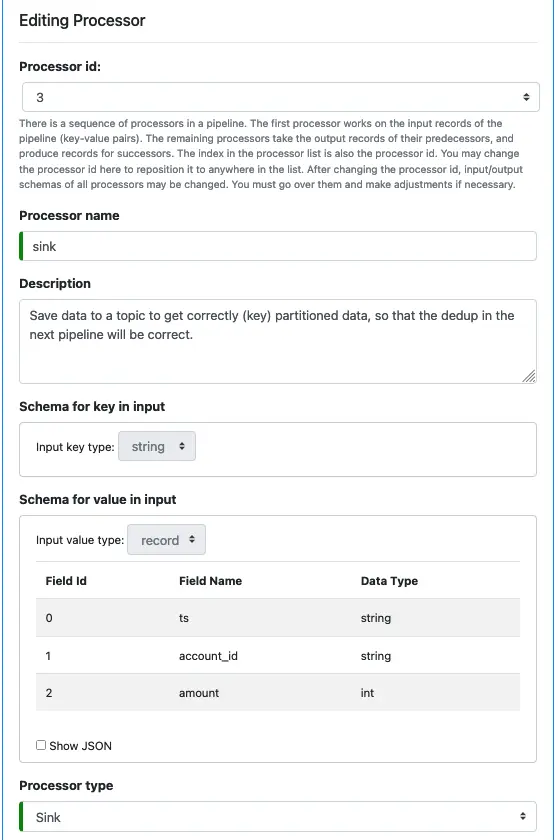
Select “Sink” as the processor type. And enter the name of the target topic. See below.
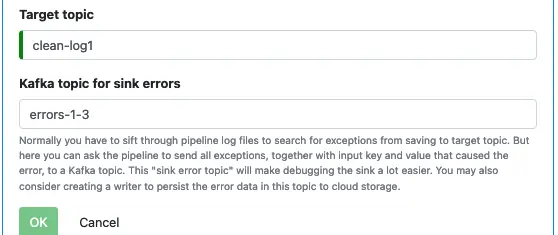
Click the “OK” button to return to the pipeline editor. The processor list looks now looks like the following.
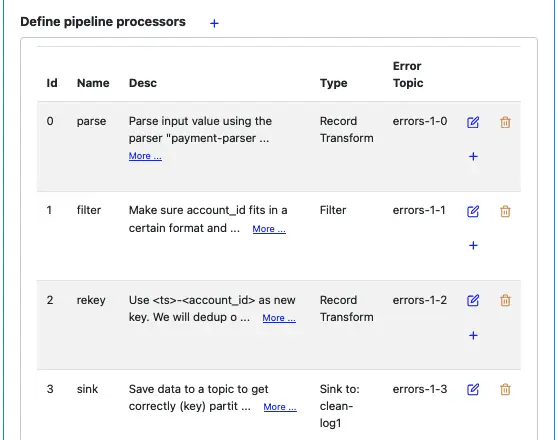
Note that you can find all the topics this pipeline needs. They are all the error topics and the sink-to topic (under the type column).
Next, we must declare what this pipeline depends on. In this pipeline, we need the parser named “payment-parser.” The dependency must be specified for Calabash CLI to generate the code.
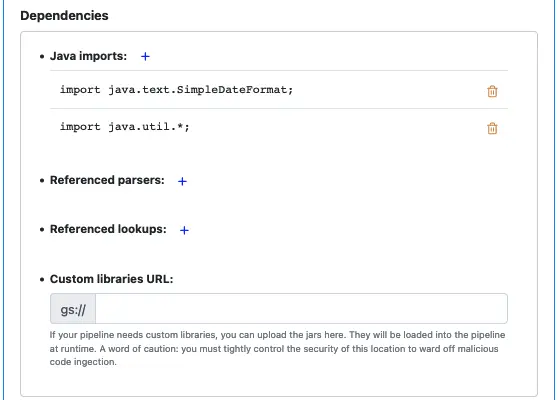
To declare the dependency, click on the small blue plus-sign button next to “Referenced parsers”. The “Add Parser” dialog appears.
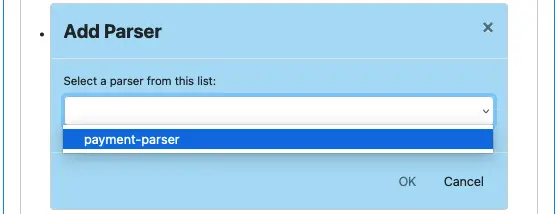
In the parser list, select “payment-parser.” Then click “OK” to return to pipeline editor. The parser dependency listing now looks like the following.

Next, we define where to run this pipeline. We can either run it on a standalone VM or we can run it in a Kubernetes cluster. In this tutorial, we choose the latter.
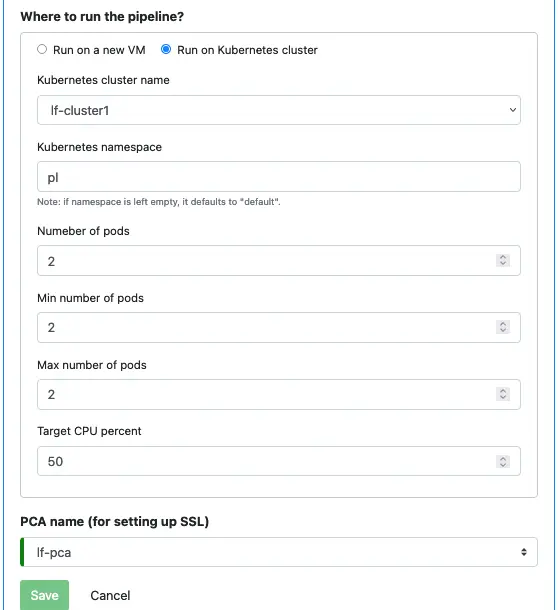
Last but not least, we must say which PCA the pipeline uses. It needs TLS (SSL) certificates to access Kafka topics. And the certificates are issued by the PCA.
Finally, we can click the “Save” button to persist the pipeline metadata to the Calabash repository.