All objects created using Calabash need a VPC network.
Creating a VPC network is optional since you can always use the default network. However, it is a best practice that you use your custom network.
You do not need Calabash to create your VPC network. You can use the GCP console for this job. However, with Calabash, you can enjoy some advantages.
- The metadata about your network is in the Calabash repository. You can undeploy a network and redeploy it later with the same setting, all done by one command.
- Calabash creates necessary firewall rules for you.
- Calabash calculates the correct custom subnet IP ranges for you.
Throughout this tutorial, we will use a VPC network named “fnet,” which stands for “financial network.” We are about to create it now.
Design the VPC Network
First, log in to Calabash GUI at https://calabash.datacanals.com.
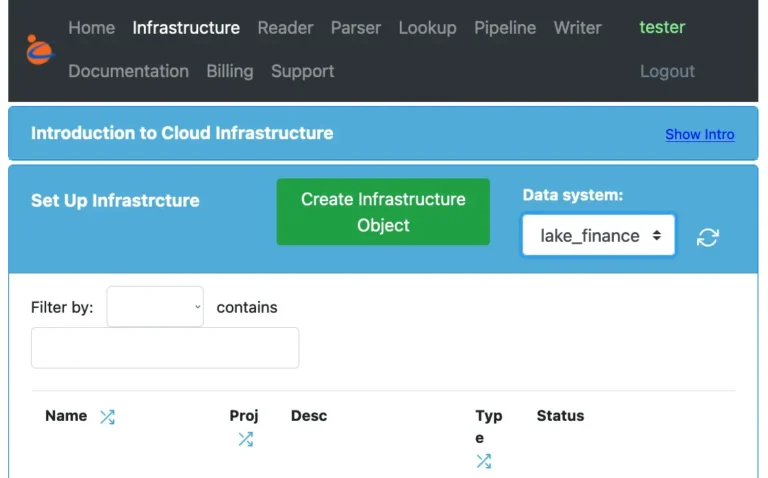
Once logged in, click on “Infrastructure” near the top to select the infrastructure page. Then select “lake_finance” from the drop-down list of data systems to set the context. All infrastructure objects listed on this page belong to lake_finance.
Then click on the big green button for “Create Infrastructure Object.” See the screenshot below.
In the form for creating infrastructure object, enter information about the “fnet” like what is shown below.
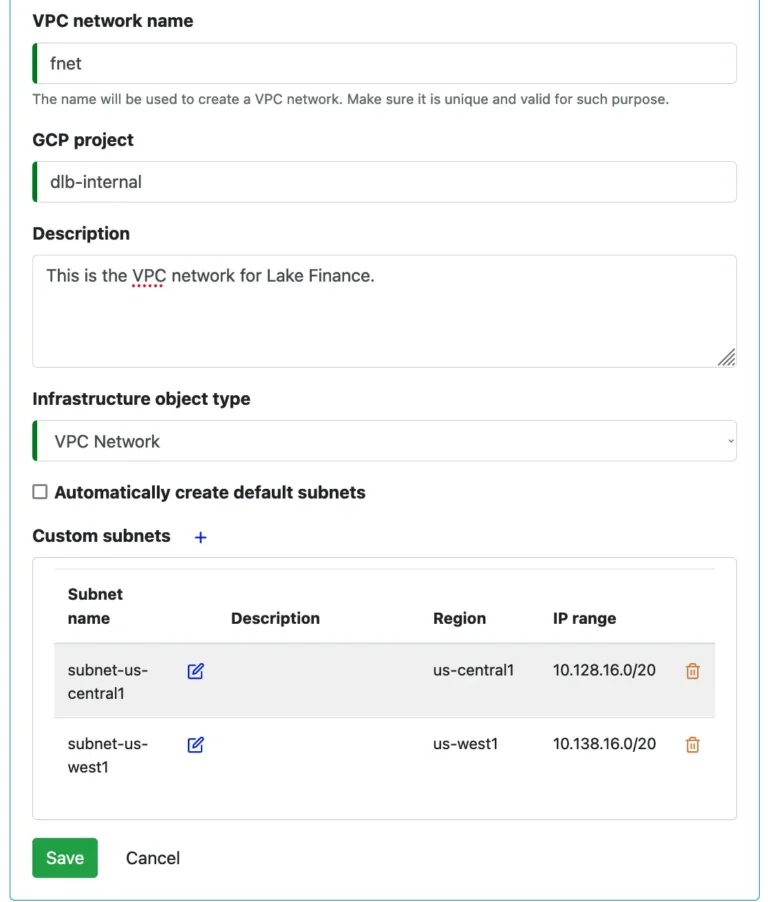
The above screenshot shows two custom subnets. You can create them in the following way.
To add a custom subnet, click on the small blue plus sign next to “Custom subnets.” A form for defining a subnet will be displayed, like what you see below.
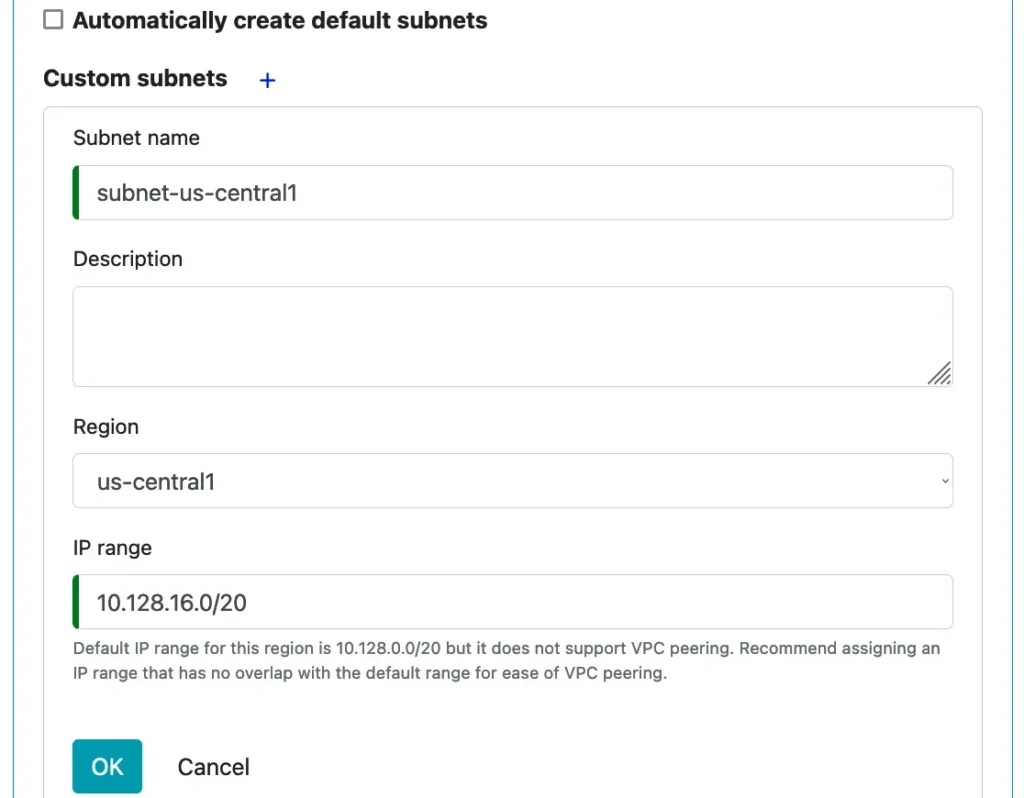
What you need to enter are the subnet name and its region. Calabash automatically calculates a good IP range for you. However, you can change it if you need to. Click on the Ok button to close the custom subnet creation form.
Finally, click on the “Save” button to commit the VPC network to the Calabash repository.
Deploy the VPC Network
Now is the time rubber hitting the pavement. We need to use Calabash CLI for the deployment.
Launch the Calabash CLI and log in with the same username and password for the Calabash GUI. Then set data system context. See the example below. In this example, the username is “tester.”
% bin/calabash.sh
Calabash CLI, version 3.0.0
Data Canals, 2021. All rights reserved.
Calabash > connect tester
Password:
Connected.
Calabash (tester)> use ds lake_finance
Current ds set to lake_finance
Calabash (tester:lake_finance)>
In the above, the boldface parts represent the commands we enter. You can see the prompt has changed to reflect your login name and the current data system name.
Then, deploy the network “fnet.”
Calabash (tester:lake_finance)> deploy i fnet
Network fnet does not exist.
Creating network fnet ...
Network fnet is created, waiting for it to become available ...
Network fnet now available.
Subnet subnet-us-central1 does not exist.
Creating subnet subnet-us-central1 ...
Subnet subnet-us-west1 does not exist.
Creating subnet subnet-us-west1 ...
Creating firewall rule fnet-allow-internal
Creating firewall rule fnet-allow-icmp
Creating firewall rule fnet-allow-ssh
Creating firewall rule fnet-allow-rdp
Deployed
Calabash (tester:lake_finance)>
The status “Deployed” indicates the network creation was all fine. You can issue the following Calabash command to see the status of the VPC network.
Calabash (tester:lake_finance)> list i
Obj Name             Project         Description                              Type                           Status
-------------------- --------------- ---------------------------------------- ------------------------------ ----------------------------------------
fnet                 dlb-internal    This is the VPC network for Lake Finance VPC Network                    Deployed at 8/15/2021, 2:15:38 AM >>> Up
                                     .                                                                       dated at 8/14/2021, 9:52:10 PM
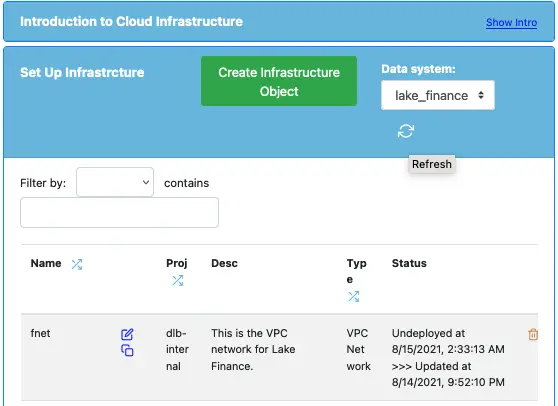
The status shows you when the Calabash CLI deploys this infrastructure object and when the Calabash GUI last updates it. You can see the same information in Calabash GUI by pressing the refresh button.
Checking on the Cloud
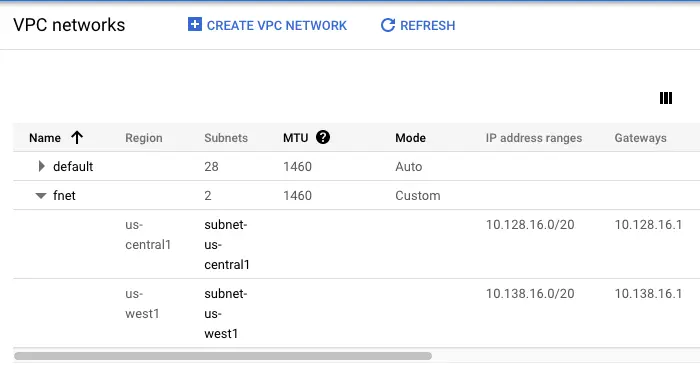
Once the VPC network is deployed, you will be able to see it in the Google cloud console.
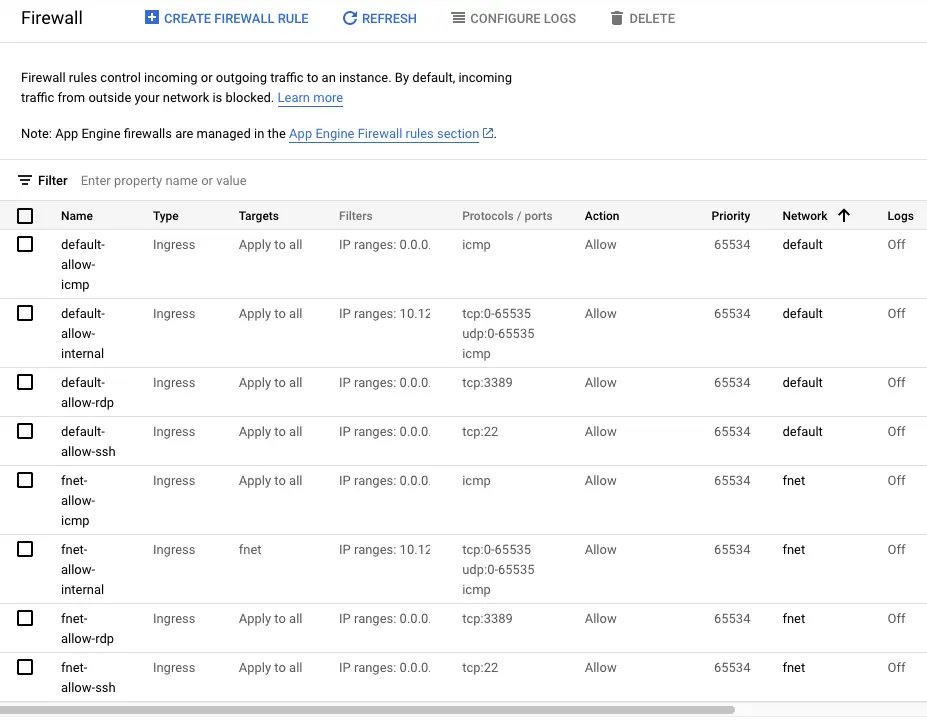
You can also see four new firewall rules.
Undeploy the VPC Network
You may check in the cloud that the network, firewalls, and routes for the VPC network are all deleted.
You may also deploy the network again if you like. Just one “deploy i” command is all you need. You do not need to worry about recreating subnets, firewall rules, etc. They are taken care of automatically.
The Cost
A VPC network is mainly charged for the amount of data going in and out of it. If there is no traffic, there will be no cost to you. Since the network “fnet” is needed for all objects created in this tutorial, you may consider keeping it deployed all the time.