Real-time data processing experts
Use Calabash GUI, click on the heading labeled “Pipeline” on top of the window. The Pipeline page becomes the current page. Set the data system to “lake_finance” and click on the big green “Create Pipeline” button.
Enter “payment-p2” as the name of the pipeline. Select the Kafka system named “lf-kafka” and enter the pipeline user name “pl.”
Since the values in the topic clean-log1 are not text, you must define a schema. See below.
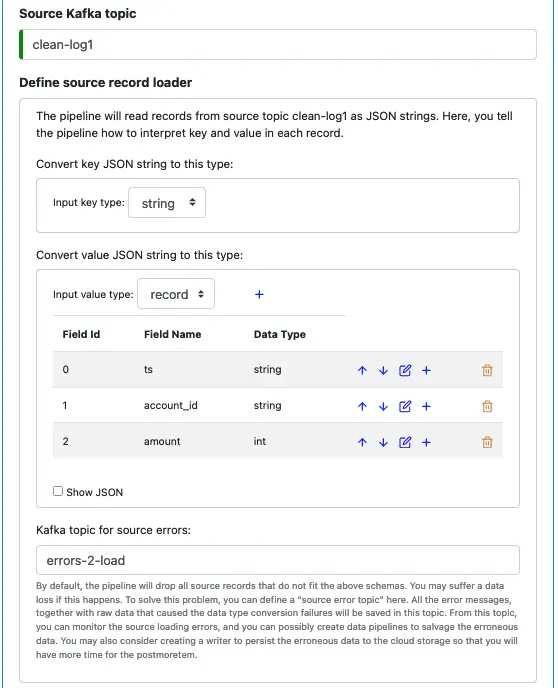
It is a good practice to set an error topic for the source. The error topic “errors-2-load” will help you capture any errors. The errors will most likely be due to an incorrect schema you have defined here. The messages in the error topic will help you diagnose problems.
For our tutorial, if you have not added more records to the topic “clean-log1,” there should be no errors in the source loader.
Next, we define processors. Click on the small blue plus sign next to “Define pipeline processors.” Enter information for the first processor as follows.
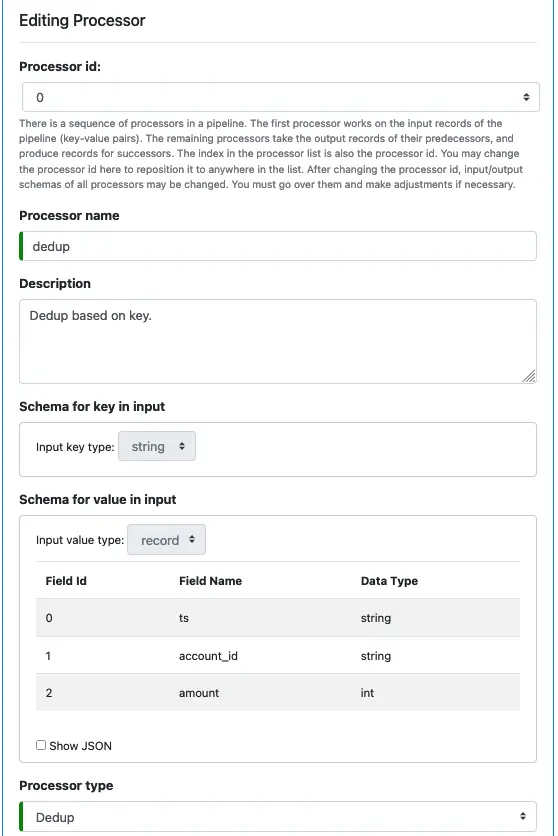
You cannot modify the input schemas because they are the key and value schemas of the source loader. We have defined them earlier.
Select “Dedup” as the processor type.
The most important property for the dedup processor is its “window size,” which is the duration of time the processor buffers data before performing deduplication. There is no such thing as a “complete real-time data set.” So we must restrict operations over finite time windows.

In the tutorial, we set the buffering time to 180 seconds. In practice, you must make a judgment based on the dynamic behavior of your data stream.
Finally, click “OK” to go back to the pipeline editor.
The second processor will be a “Record Transform” processor. We want to convert the amount to USD. To that end, we must find out the currency exchange rate. To find the currency exchange rate, we must find out the currency code for the amount. This processor will call two lookups to get those values.
Start by entering the following information in the processor editor.
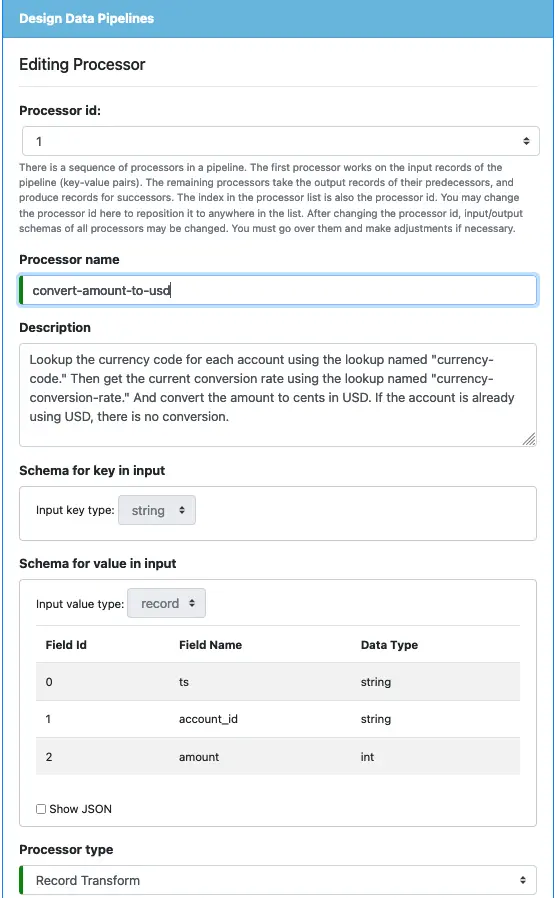
You will not be able to modify the input key and value schemas because they are the output schemas of the first processor. Select the processor type as “Record Transform.”
Next, we define the output schema. The record key schema will continue to be “string.” But the value schema will have new fields. Create the output value schema like in the following screenshot.
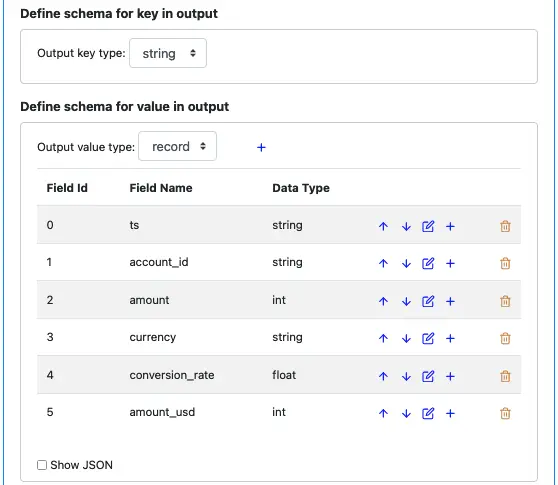
Fields “ts,” “account_id,” “amount” are direct copies from the input record. The rest are new.
Next, we define the preprocessing function. Click on the edit button next to “Preprocessing.” Enter the function body below.
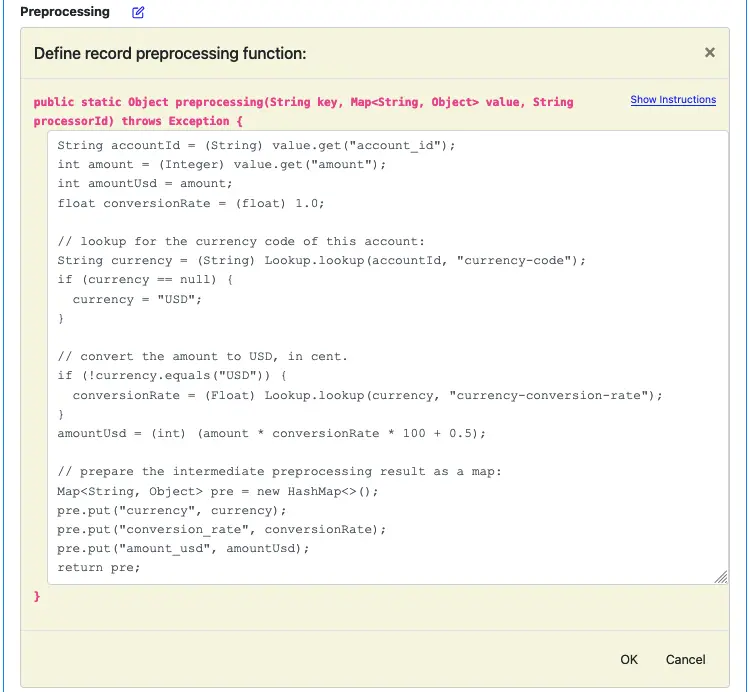
For you convenience, the above text is repeated below.
String accountId = (String) value.get("account_id");
int amount = (Integer) value.get("amount");
int amountUsd = amount;
float conversionRate = (float) 1.0;

// lookup for the currency code of this account:
String currency = (String) Lookup.lookup(accountId, "currency-code");
if (currency == null) {
  currency = "USD";
}

// convert the amount to USD, in cent.
if (!currency.equals("USD")) {
  conversionRate = (Float) Lookup.lookup(currency, "currency-conversion-rate");
}
amountUsd = (int) (amount * conversionRate * 100 + 0.5);

// prepare the intermediate preprocessing result as a map:
Map<String, Object> pre = new HashMap<>();
pre.put("currency", currency);
pre.put("conversion_rate", conversionRate);
pre.put("amount_usd", amountUsd);
return pre;
The code above demonstrates how to call a lookup. The format of calling a lookup is
Lookup.lookup(key, "lookup-name")
The call returns the result as an object. You can cast it to the actual type.
The call returns the result as an object. You can cast it to the actual type.
The preprocessing result is a map containing “currency,” “conversion_rate,” and “amount_usd.” A common practice in the software industry is to work with the USD amount in cents, so we can keep it as an integer to eliminate accrual of inaccuracy.
Next, we calculate the output fields.
The key field is easy: there is no transform on the key. Just return the input key. Click on the edit button and enter “return key;” as the function body.

For the value fields, edit each output field and enter the function body code as in the following screenshot.
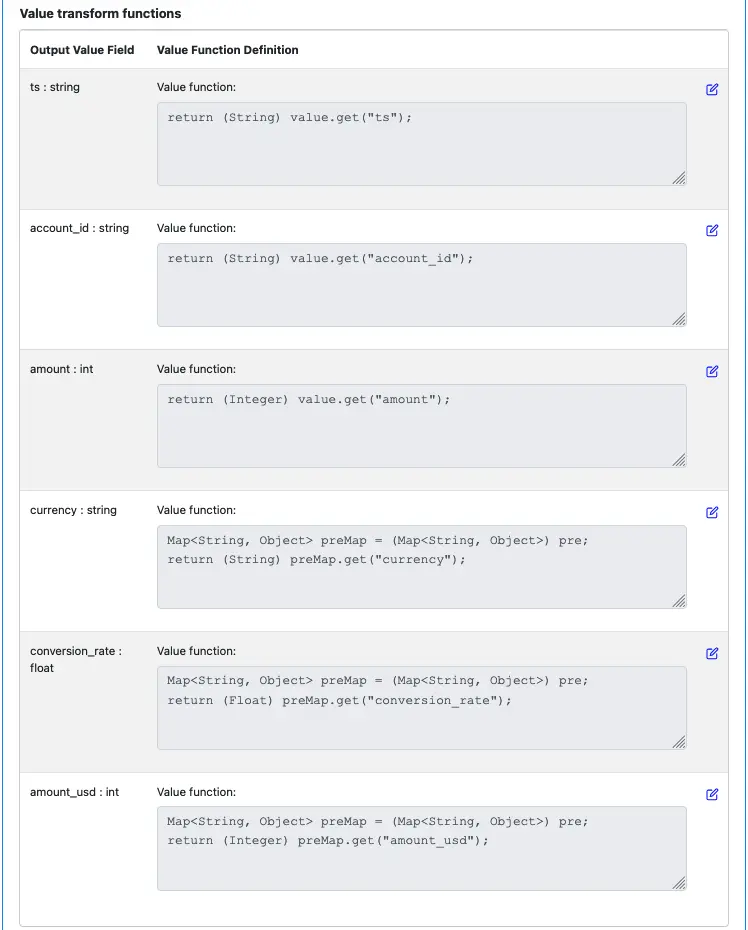
Please take some time to fully understand the code. Click on the edit button to bring up the function editor may make the code more readable.
Finally, enter the error topic name, and click on “OK” to return to the pipeline editor.

The third process will be a simple one. We want to make the account_id the new key so that a downstream pipeline can perform group-by and aggregation for each account.
Start by entering the following information in the processor editor.
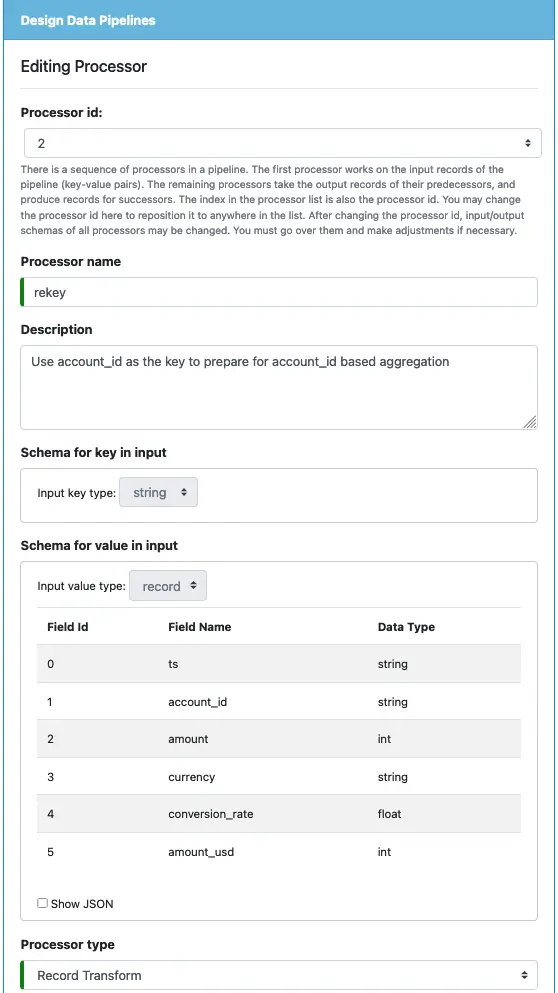
Select “Record Transform” as the processor type. The input key and value schema look like the following.
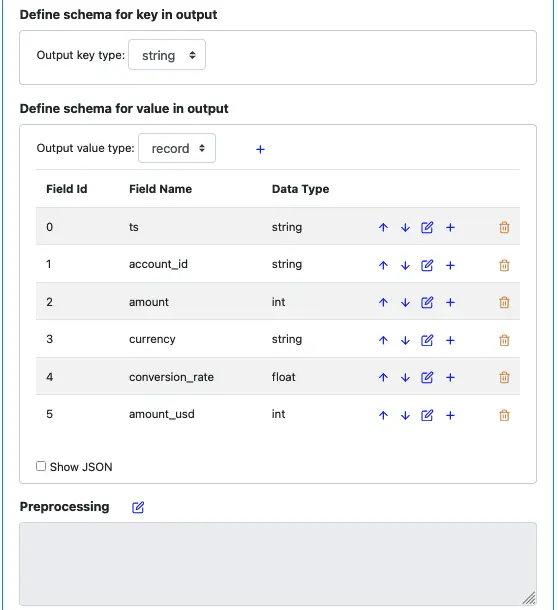
There is no need to add any preprocessing function.
Next, we handle the most important part of this processor: creating a new key. Enter the code for the key function as the following.
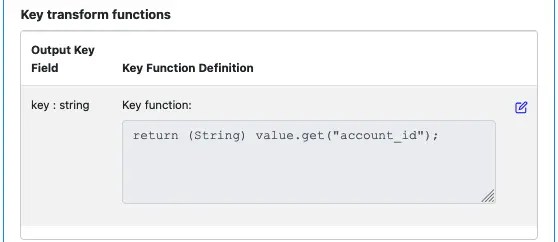
We have put account_id as the new key.
All value fields are the direct copies of the input fields.
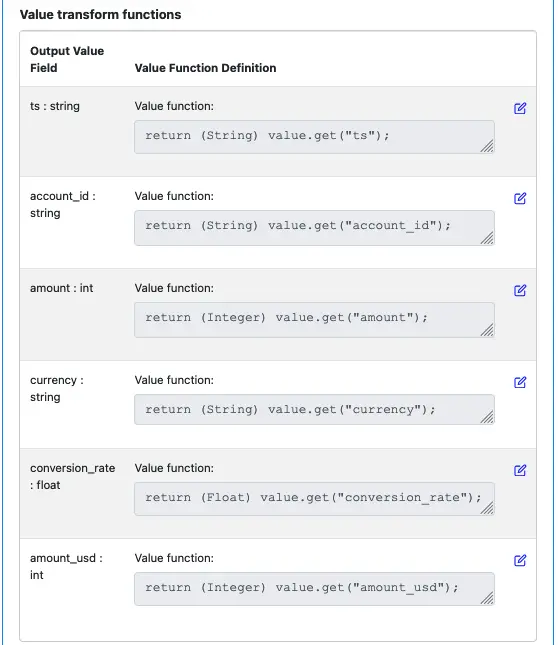
Finally, enter the error topic and click the “OK” button to go back to the pipeline editor.

Name the last processor “sink” and select “Sink” as the processor type.
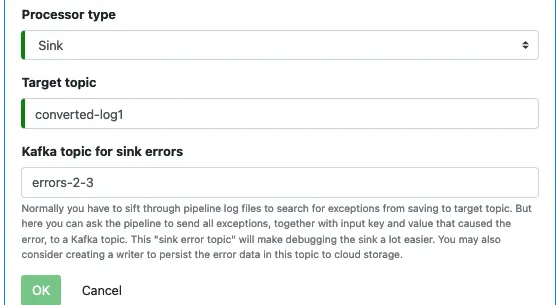
Enter the target topic and error topic name. Click on “OK” to return to the pipeline editor.
In the pipeline editor, the list of processors looks like the following.
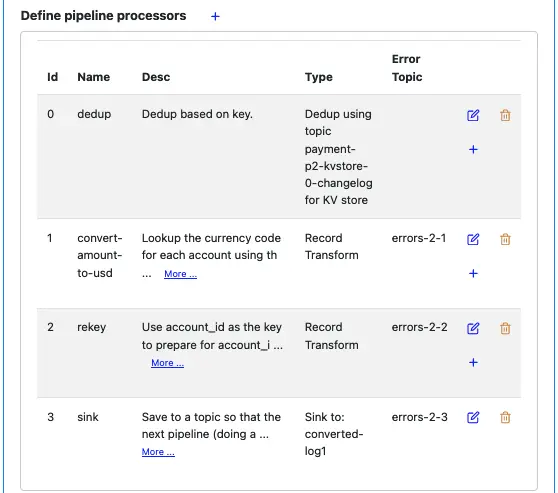
This summary is a convenient reference for creating Kafka topics. Before deploying the pipeline, you must ensure these topics exist with appropriate permissions. We will do that in the next tutorial topic.
Two more things we need to define.
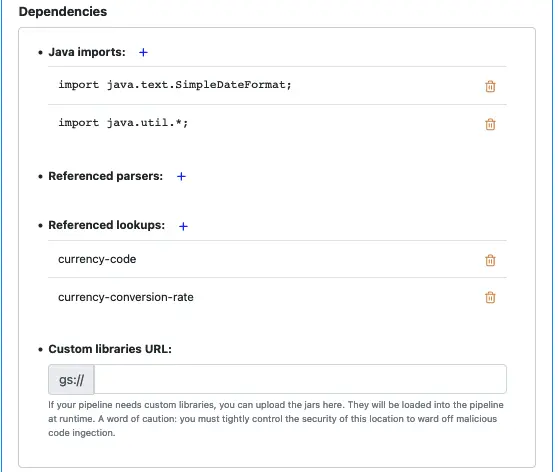
We must define the dependencies. This pipeline needs to call two lookups. Add them in the “Dependencies” section as follows.
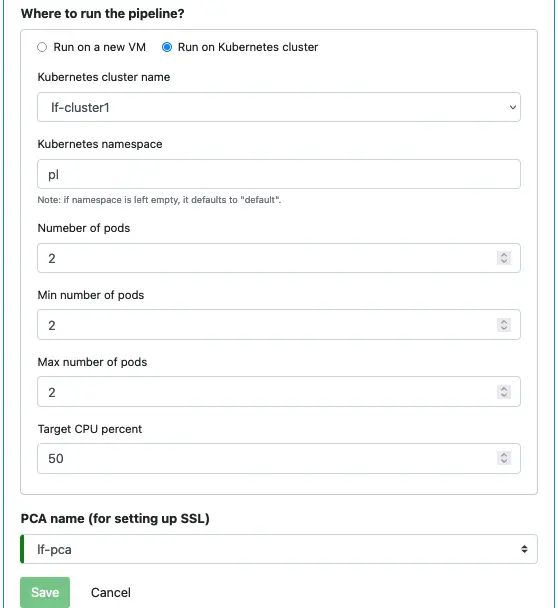
We also need to define where to run this pipeline and which PCA the pipeline needs to use.
Enter information as in the following screenshot.
Click “Save” to persist the pipeline metadata to the Calabash repository.