Use the Calabash GUI click on the “Infrastructure” on the top of the window. The Infrastructure page becomes current. Select “lake_finance” as the data system. And click on the green “Create Infrastructure Object” button.
Fill in the form as follows.
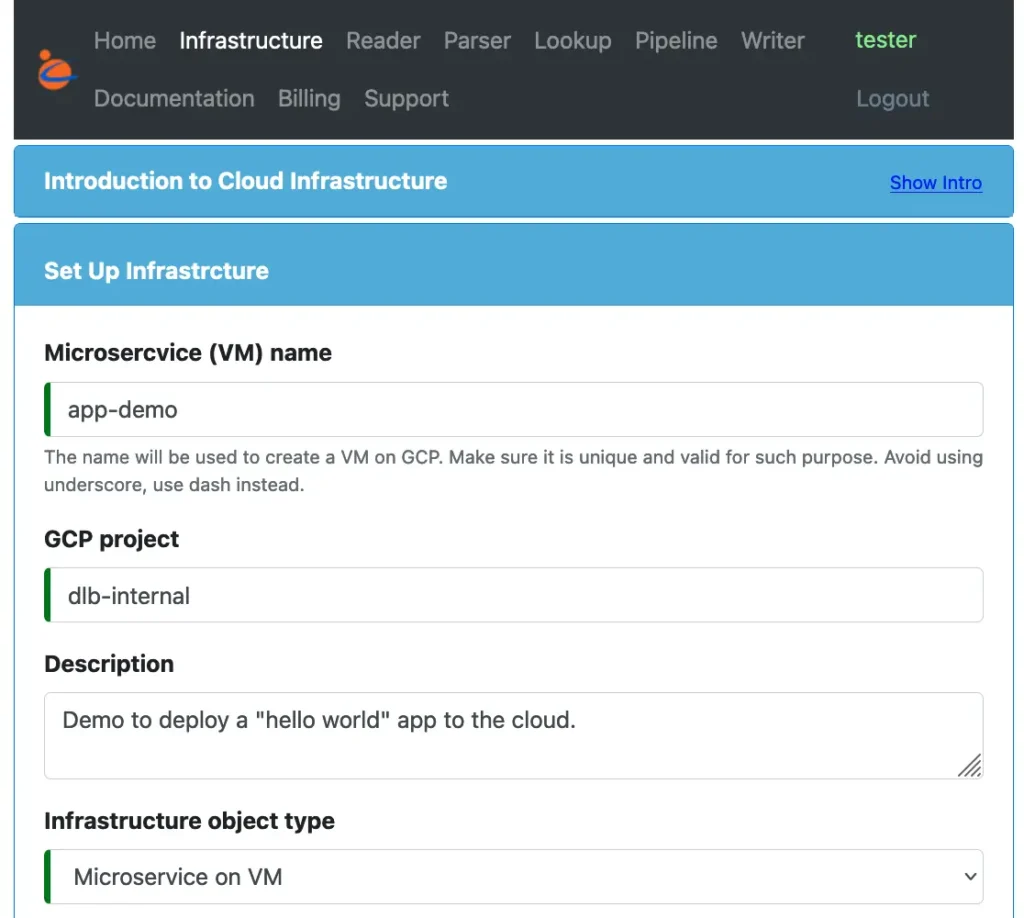
You may name the VM with anything. Select “Microservice on VM” as the infrastructure object type. The GUI changes to show all the properties for this type of object.
Next, fill in some “hardware” related properties.
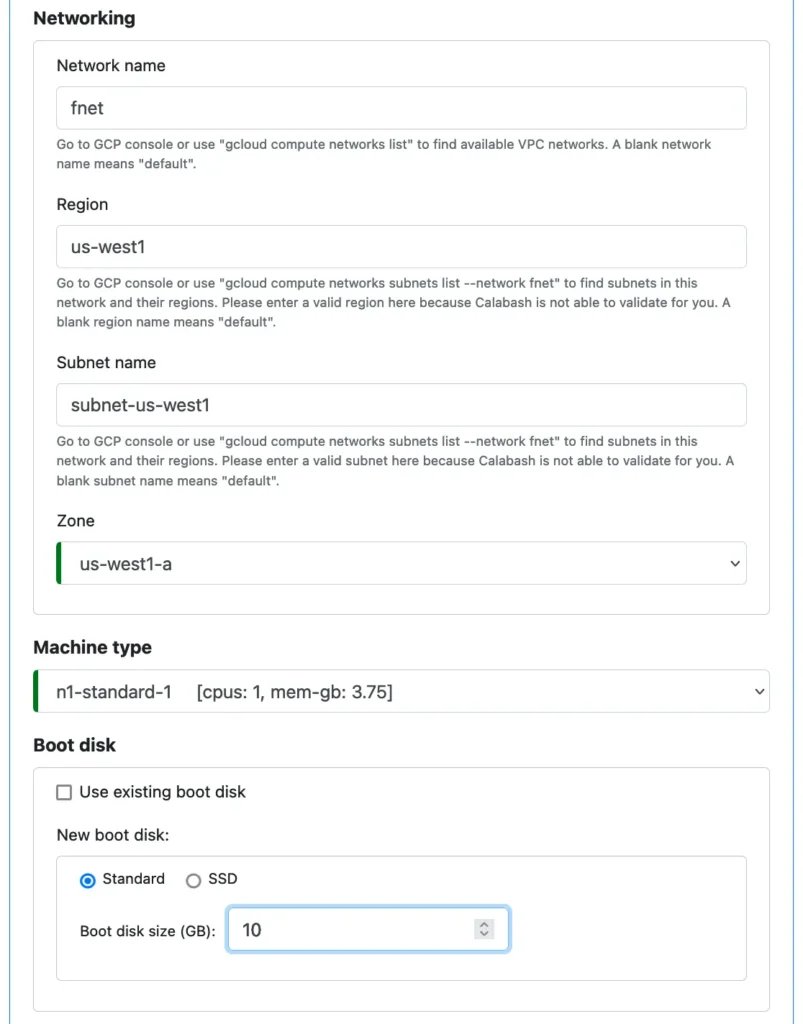
Next, we set properties for the software, i.e., our “helloworld” application.
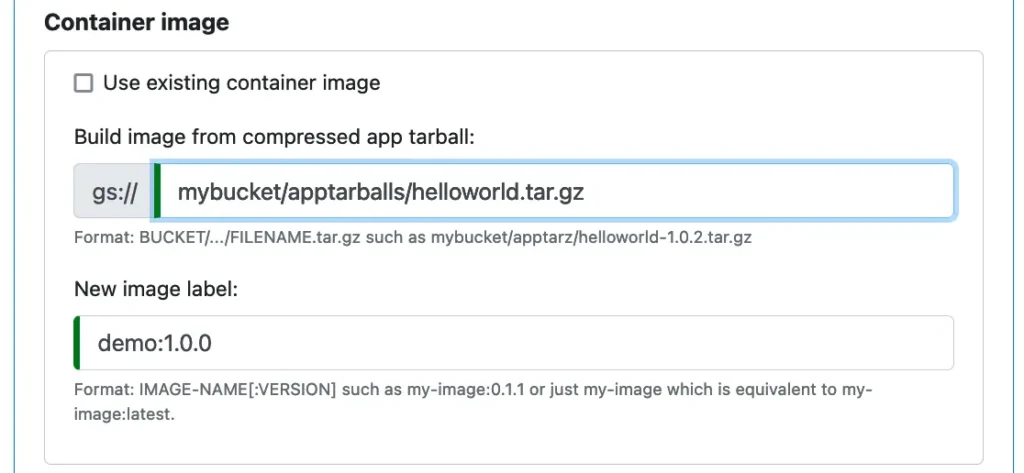
As of now, we do not have a container image in the cloud yet. We can ask Calabash to build it for us. To that end, we need to pack up the content in the “container1” directory in a compressed “app tarball.” Then upload this compressed file to a cloud storage location. We will talk about the “app tarball” in more detail shortly.
We also need to refer to the image. So we add a label for it. When this microservice is deployed, Calabash will first retrieve the app tarball. Then the image will be built. When all is fine, the image will be labeled “demo:1.0.0.” The new container image will be stored in the container registry in GCP, ready for being shipped anywhere.
An “app tarball” contains all files needed for building an image. In our example, the following commands create the “app tarball.”
% cd helloworld/container1
% tar cvf helloworld.tar *
a Dockerfile
a app
a app/run.sh
a app/helloworld-1.0.2.jar
% gzip helloworld.tar
% ls -F
Dockerfile        app/        helloworld.tar.gz
%
Notice that this tarball must also be compressed with gzip.
After that, we copy the app tarball to the cloud storage:
% gsutil cp helloworld.tar.gz gs://mybucket/apptarballs/helloworld.tar.gz
We are now all done preparing the software to run in the cloud.
Next, in the Calabash GUI, we need to define the service port to allow connections to our application.
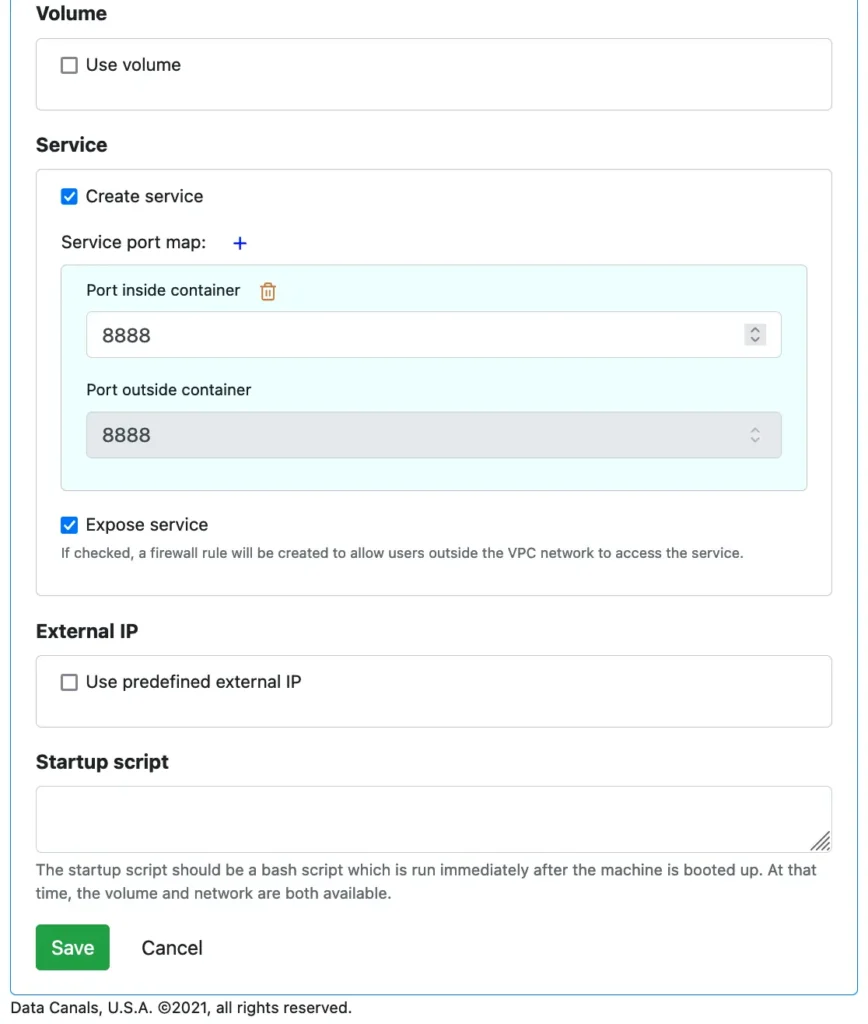
The above screenshot shows that we can also use a volume, a predefined IP and write a startup shell script. But in our simple application, we will use none of those features. So leave them empty.
We only need to define the port for the service. The internal port 8888 is mapped to the external port 8888.
That is all for designing a microservice on VM. Next, we will deploy this design to the cloud using Calabash CLI.
The Calabash CLI can be downloaded from the Data Canals website. It does not require installation. Just unpack, and it is ready for use.
To deploy our microservice named “app-demo,” issue the “deploy i” command in the Calabash CLI. See below. (In the following, assume the Calabash CLI is unpacked in the directory named “calabash.”)
% cd calabash
% bin/calabash.sh
Calabash CLI, version 3.0.0
Data Canals, 2022. All rights reserved.

Calabash > connect tester
Password:
Connected.
Calabash (tester)> use ds lake_finance
Current ds set to lake_finance
Calabash (tester:lake_finance)> deploy i app-demo
Deploy to cloud? [y]:
Waiting #0 for image build...
Latest build: cdb31fcb-b452-4b7c-ada3-5e81784142d9, Started: 2021-12-15T04:49:27.584584166Z, Current status: SUCCESS
Got a successful latest build: cdb31fcb-b452-4b7c-ada3-5e81784142d9
Creating vm app-demo ...
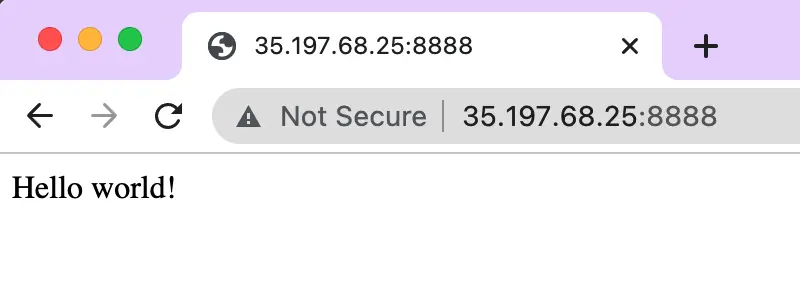
Deployed to 10.138.31.219:8888 (internal) 35.197.68.25:8888 (external)
Calabash (tester:lake_finance)>
We assume the microservice we designed earlier is located in a data system named “lake_finance.” So we change the context to this data system. Then we issue the “deploy i” command.
The image build task is kicked off first, and we wait until it completes. If the build is successful, a VM is created, and the container is launched in the VM. The IP addresses of the service are returned.
Using a browser, we can see the service is working in the cloud.
Finally, we can delete the microservice and return the computing resource to the cloud with one Calabash CLI command.
Calabash (tester:lake_finance)> undeploy i app-demo
Undeployed
The “undeploy i” command returns in a few seconds. It just kicks start the resource deletion process. The actual cleanup in the cloud may take a few more minutes.
In this tutorial track, you have practiced the complete procedure for designing and deploying a microservice on a VM. The simple “helloworld” is just a representative of any application. You now have one extra degree of freedom when you need to run an application — run it in the cloud!
But as suggested in the above browser screenshot, this endpoint is not secure. To learn the procedures for tightening the security, please continue with this article.